When I was starting my teaching journey, between classroom observations and my student teaching experience, I watched and taught a lot of introductory sight word lessons. They usually looked something like this.
"Ok, everyone, we are going to learn this week's sight words. I will show you the word on a flash card, tell you what the word is, and you will repeat it back." I would say the word, and the students would echo. I would flash through about 10-15 words and the students would continue to echo the words. I would use the word in a sentence, or even ask the student to use it in a sentence. THERE, that's it, I taught the sight words for the week! The next day, I would display the words on a board somewhere, and we would repeat the process until the students could read the words without me prompting them. During centers, these sight words would be reviewed in our text and the following week they would be in an independent center.
To
say that I'm not super proud of my early sight word instruction, would
be an understatement. I owe all of those students and parents an
apology letter! We know all too well that our students learn in
different ways. After some searching and experimenting, I believe sight word instruction is one of the best times to include a variety of
learning modalities all at once. It is so easy to differentiate.

Whether you teach sight words, high frequency words, bubblegum or popcorn words, our students need to be able to recognize words that appear in text with rapid visual retrieval in order in improve their reading fluency, and comprehension. As our students progress, most words become "sight words" and the content specific words become the words that need more instruction. However, early on, these "sight words" are crucial in our students' reading instruction. So, how can we ensure that our sight word instruction is the most effective it can be? In this three part blog post, I will share:
- How to effectively and explicitly teach sight words
- Ideas for sight word practice during literacy centers, and reinforcement at home
- How to re-enforce sights words in context
Let's get started, and explore "How to Effectively and Explicitly Teach Sight Words"
FIRST TIME instruction should be fun, engaging and get students excited to read. Flash cards may have their time and place, but I can say with good confidence, that they do not have a place in a first time explicit sight word lesson. This time of introducing words is critical. Our students need to know what the word is, how to recognize it, and how it is used in context. We are growing readers! Let's give them all we've got!
 Sight words rely on VISUAL recall. The shape the letters make allow students to know what the word is. However, to assume that a student will visually recognize that word after seeing it on a flashcard is a bit unrealistic. You can help your visual learners even more by providing a picture clue that relates to the word. If you are teaching the word 'down', write the letters d-o-w-n on an index card, in a downward direction. If you are teaching the word 'friend', have your students draw two friends on the back of an index card with the word on the front. Now, they can flip it over if they get stuck. Allowing your students to be involved in the process of connecting visual pictures to words will only help the words to "stick".
Many of our students are AUDITORY learners. They learn best by hearing. This can be a struggle because sight words are visually dependent. However, we can try to incorporate as much auditory feedback for our students as possible. One way to do this, is to read sight words aloud as much as possible. Now, those flash cards aren't so bad, but let's explore some ways to use them better. You can have students read to each other or do a whole class read of your word wall in silly voices. You could first keep the card covered, while you spell the word out loud. Then ask students which word your are thinking of. Even if your struggling student isn't reading along (right now), they are getting that auditory support from their peers.
My favorite way, and an effective way for my students, is to sing or chant our sight words. Auditory support can best be given through spelling out the sight words. This helps with memory and writing, so it's a win win. Here is a link to some sight word chants and songs. I keep these right next to my small group table and I use them daily. Personally, I like the songs best. I try to predict which words are going to be tricky and use each tune only once. I have sometimes found that repeating a tune can cause confusion for my struggling readers. In the beginning of the year, I pick the chants, so they can be introduced . But now students ask for them by name! Additionally, any big body movement you use with the chants, help to activate your tactile learners.
I have always found my TACTILE learners the hardest to reach when instructing sight words. How do you make recognizing and reading sight words hands on? You can rainbow write, use play-doh and shaving cream. I'm not putting these ideas down, they are great hands on ways to practice spelling sight words. However, unless you are a teacher saint, you probably don't want to tackle these whole class, during first time instruction. These explicit teaching moments are precious, and the chaos that can come with sensory activities have the potential to detract from your instruction. These activities are great for centers (and I will touch upon them in the next blog post), and lend themselves more to practice, once your target words have been explicitly introduced.
During the Spring of 2015, I was trained in the Orton-Gillingham method of teaching, through the Institute of Multi-Sensory Education (IMSE). By following a multi-sensory approach to teaching phonics and sight words you can activate all learning modalities. I have found this method incredibly successful and easy to implement. Additionally, it is the best way I have found to explicitly introduce sight words to my students (especially whole group).
Note: IMSE uses this strategy to teach "red words" or words that cannot be decoded. Red means STOP, I need to think about this. Decodable (phonetic) words are taught as green words, meaning the student can GO ahead and sound them out. Words such as 'like' and 'little' are decodable, however the phonetic skills needed to read them are commonly taught in first grade. I do not think I could get through the first few weeks of kindergarten without the words 'like' and 'little'. So, depending on what age group you are working with, 'like' and 'little' may need to be red words (or sight words). I have a district mandated "sight word list" on which, some of my words are true non decodable red words (was, kind), while others are decodable (man, car, them). I teach them all using the following strategy because these words need to be automatically recognized. The thing to remember with "red" words, is that there isn't a set list of words, it is the strategy that is important.
 All you will need:
Plastic canvas - You can get this a your local craft store or Wal-Mart (I have not found it at Target) :-(
Red crayons - You can really use any color, but if you are sticking with the idea that sight words are not decodable, red is a nice color
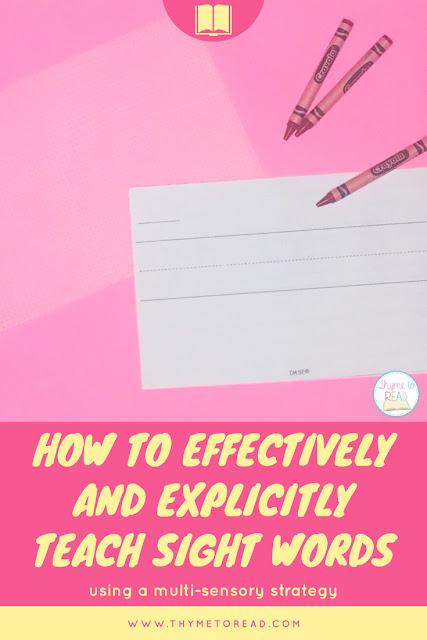
Paper - with primary lines that are appropriate for your students.
Pencil
To start, you will need to put the new word you are instructing on the board (I will explain with the word 'little').
Be sure to tell your students what the word is (There is no need to make them guess, this is explicit, first time, instruction).
Spell the word for your students. "L-I-T-T-L-E" If you have picked a tune for your song, now is the time to sing your heart out. The tune of 'Happy Birthday' is my song for 'little'.
You can use the word in a sentence for them. This will allow your students to make a connection to the word in context. "Reno (my dog) is very little." My students know my dog, I speak of him often, so this is a good connection they can all share.
 Next, your students will use their red crayon to write the word on their paper. The paper should be placed ON TOP of the plastic canvas. The small holes in the canvas help to give tactile feedback - similar to a crayon leaf rubbing. The raised edges create bumps in the word.
Your students spell the word out loud while they are writing. The visual learners are seeing the word being formed. Your auditory learners can hear themselves and peers spell the words. While, your tactile learners are getting input from the bumps.
Next, model for your students how to trace over the bumpy letters they just made with their finger, while spelling the word out loud. This again, is providing all the sensory input for your class. Have students spell the word three times out loud. Each time repeating the word. "L-I-T-T-L-E, little. L-I-T-T-L-E, little. L-I-T-T-L-E, little."
Now have your students stand up and take their paper in one hand, and use the other hand to tap on their arm. I find it easier to have ALL students hold the paper in their left hand, put their right hand on their shoulder and tap down their arm toward their wrist.
However, in my IMSE training, this method of tapping was used for right handed students only. Left handed students need to hold the paper in their right hand, and arm tap with their left hand starting with the wrist, up to the shoulder. This allows for correct left to right movement. I have found teaching both ways to be confusing because I cannot model both at the same time. And as a lefty myself, we are used to doing things the right handed way. I have not found it harmful to have all students tap from shoulder down.
While tapping your students are spelling and saying the word again three times. "L-I-T-T-L-E, little. L-I-T-T-L-E, little. L-I-T-T-L-E, little."
 Students can sit back down, put the weave board on top of their paper and repeat the "trace, spell, say" process from before. The weave board on top of the paper is giving a little bit more feedback, and is just an easy way of switching things up.
At this point, have your students turn their paper over while you remove the word from the board. Next, your students can write and spell the word three times, while you circulate to make sure they are spelling it correctly. If so, they can write a sentence using the word. If they didn't spell it correctly, have them flip their paper over and "trace, spell and say" three more times for extra reinforcement.
That's it! This routine takes less than 5 minutes once your students have it down. The predicable nature of this routine is great because you do not need to reteach rules or expectations. Students know exactly what to do, so they can focus on their sight word learning rather than "Am I doing this right?"
These sight word "rubbings" can be stored in a folder. My students have their own personal set of multi-sensory flashcards so they can "trace, spell and say" while I am getting set for a new activity.
IN SUMMARY
First time introductory lessons, especially for these
building blocks of reading are crucial. Providing your students with
differentiated instruction that activates different learning modalities
will help them to be more successful! By following a predicable routine
when introducing your weekly sight words, students will be able to focus
on their learning rather than what they are doing. OK, so how do I know this strategy works? As I mentioned before my district has a set list of sight words for each grade K-2 (50 Kinder, 150 First, 100 Second). I work with struggling readers, so my instruction matches their deficit. Most of my first graders spent the better part of Fall and Winter learning their Kindergarten sight words. Right now, they are working on the first 50, first grade words. I assess my students weekly on the 50 words - I do not teach 50, I only assess on 50. By assessing 50 words consistently, it gives my students a benchmark goal, and allows me to see if they are only learning the words I am explicitly teaching, or if they are able to pick up some words because of their high frequency in text. I have seen my students get a word wrong week after week on a sight word assessment, and miss the word in text. Then, after I have used this method and combined it with some big body chants or songs, they never forget it! It may not come off the tongue with rapid fire the first week, or in the first book they see it in, but with a little prompting to "spell the word down your arm" it comes back to them (usually before they finish spelling it). I promise you, I have seen the light bulbs click - this is no joke!
What if my students don't get it? I'm going to encourage you to try this strategy out with your students. Please know that I am here to help and support you in any way that I can, so if you have a question please let me know! In return, please check back in and let me know how it goes. I would love to know how you are helping your students learn their sight words.


