Proven Strategies to Fuel Your Phonics Lessons

Discover proven strategies to improve phonics lessons. By using an Orton-Gillingham, multi sensory approach you can help your struggling readers with research based intervention.
incorporating a phonics block into the primary classroom using a multisensory orton gillingham approach
I recently shared a post about why an explicit phonics lesson should be a part of our daily ELA block. By outlining what I do in my small intervention groups, I hope to make planning for your phonics block easier.

Some quick background information...

- Phoneme = the smallest unit of distinct sound. Phonemes are put together to make words

- Graphemes = the way we write each phoneme. Graphemes can be made of 1 letter (d, a, etc.), 2 letters (br, ch, ay, etc.), 3 letters (thr, spl, tch, etc.) or 4 letters (eigh, ought, tion, etc.)

- Why is using a multi-sensory approach so important to phonics instruction? Using research based strategies is what is best for our students, and teaching phonics in a systematic and hands on way is proven to be a successful instructional strategy to reach ALL learners. Studies show that one in five students have a language based learning disability, and dyslexia is the most common language based learning disability. So, we have students in our classrooms today that this method of instruction will benefit and help to unlock the building blocks of reading and writing. Although, instructing with all the different modalities in mind can be difficult, it allows us to guarantee well rounded instruction for our students, especially those readers who are struggling. 
When colleagues come to me, and ask about how I teach phonics, the first thing I say is..."Let's work together to set up a quick phonics routine. It will be your new best friend!" Then I walk them through setting up their first set of phoneme/grapheme cards. Having phoneme/grapheme cards can make visual, auditory and tactile instruction seamless, and even easy for us. 

How can we start using an Orton-Gillingham approach in the classroom?

This three part multi-sensory routine is the core of our phonics block. I aim to complete this routine with my students at least three times per week, and it takes 5-10 minutes. I use it as a warm-up, but you could do parts of this drill (1 and 3) while lined up before heading to lunch.
  1. Visual practice
      • during this drill, we show students a grapheme card and have them produce the sound (or phoneme) it makes. This is meant to be quick! If students make an error, correct the error and put the card at the back of the pile to flash again before moving on. There should be a mix of graphemes that our students have learned, but are not using (reading or writing) automatically. We will gradually add more graphemes as we provide explicit instruction, and we will remove graphemes once our students have mastered them. 
  2. Auditory/Tactile practice
      • during this drill, (without showing our students any visual) we produce the phoneme, and the students produce the grapheme in rice, sand or on a felt square. Additional auditory support for our students comes from hearing themselves and peers re-produce the sound for the grapheme after writing it. If students make an error, correct the error and immediately have them re-write the correct grapheme, and produce the correct phoneme. 
  3. Blending practice
      •  during this drill, we show a string of initial, medial and final graphemes, and together with our students blend real/nonsense words/syllables. When introducing this routine, I always start with "I do" examples - this allows me to set my expectation - students do not make the phoneme without me tapping the grapheme. This gives me a moment to check the word for "rule breaking". For example, we do not want our students to blend the word KAT, because K is not the initial letter when A is the medial vowel. (Check out the Cat/Kite rule)
      • Once expectations have been set, and students know to only make the sounds when I have given the signal, I change ONE grapheme at a time so students can build up some familiarity. This ends up being very similar to a chaining activity. 

How do we teach a new concept?

The three part routine is perfect for quick practice and spiral review. It keeps concepts current and we control the practice, giving our students exactly what they need, when they need it. When we introduce a new phonics skill, we need to provide explicit practice before including it in the three part routine.

  1. Phoneme/Grapheme Discovery 
      • We can say three words that include the new concept (mail, paint, chain), and ask the students what sound the words share (they all say A). Then we can write the same words on the board, and ask the students to begin to make a phoneme/grapheme association (AI says A). This would also be the time to introduce a concrete object to help solidify your students understanding a little more. 
  2. Guided dictation practice
      • This can be repeated as needed, and I like to mix it up by occasionally including words from review spelling patterns. I do NOT give "gotcha" words like wait and play UNLESS I have explicitly taught that AI is a beginning and medial phoneme/grapheme and AY is a final phoneme/grapheme. 
      • During this part of instruction, we use a gradual release model (I do with think aloud, we do, you do) to write words that follow the new concept (paid, sail, stain, waist, etc.). We can even dictate a full sentence so students have a chance to practice correct conventions. 
  3. Guided reading practice
      • We can give our students words to read. Early in the week, I will show my students a word on a flash card/or written on the board. Then, I have them tell their hand a secret. One the count of three they let the word go and say it out loud. This allows students who are not quite comfortable yet some time to become more familiar with the new skill. By mid week we tell our "secret" to a neighbor, there is a little more accountability there AND the skill has been added to our three part routine. By the end of the week, I may call on some students to read words/sentences aloud. 
      • This is also the time to provide our students with systematic decoding practice by teaching syllable types. You can learn more about the seven different syllable types from this post/video.
      • During this time, we also introduce a phonetically controlled text. This is so our students can get more authentic practice (beyond words and sentences). These phonetically controlled readers provide our students with the opportunity to read a text that has only the patterns they have been taught. We are asking them to foremost rely on the spelling and sound patterns to read. 
        • Side note: leveled readers rely more on inferential learning (or the use of context to learn to read). We often say with our littles to look at the pictures, or read around a tricky word. With phonetically controlled text, the hope is that pictures and context clues are not needed. 
  4. Centers
      • When introducing a new concept we want to give our students some exposure time before expecting them to apply it. For this reason, I usually wait to put a new phonics skill into centers until at least one week after I have introduced it. This give us the opportunity to monitor students' practice and acquisition of the skill before releasing them on their own. If our students are not grasping the concept with us, then we do not want to give them the opportunity to practice it wrong on their own. 
I hope now you can see how this instruction will fit the needs of your whole class, and small groups - on any given day, the only difference is the actual spelling pattern being taught. When using these routines with your whole class, you teach what the majority (80%) of your students need practice with. If you are held to strict scope and sequence, your skills will come from there. When you are differentiating in your small group, you teach what the majority (80%) of THOSE specific students need. If you have made your small reading groups based on reading level, it is possible you will see correlation between reading level and phonics need. However, I like to use a quick diagnostic decoding survey (this one is a free download) to help organize my reading groups (K-2) by phonics need. By differentiating your instruction in small groups like this, you can provide more exposure and practice for the students who need it a second time around.

What else do you want to know about starting up a phonics block in your classroom?

SAVE FOR LATER:
how to incorporate a phonics block into the primary classroom using a multisensory orton gillingham approach


Together everyone accomplishes more.


All You Need to Know about Orton-Gillingham Phoneme Grapheme Cards

Things you need to know about your Orton-Gillingham Phoneme Grapheme Cards. Learn why keeping your cards in a Blending Binder will make your three part drill a breeze to differentiate for your small reading groups
things you need to know about orton gillingham phoneme grapheme cards
The three part routine is my favorite part of the phonics block. I love how flexible it is. It can take five minutes...or if we are coming back from a long weekend, and my students need some solid review, we can practice longer. I can even do parts of the routine in line. I have complete control of the phonemes/graphemes that my students are practicing. That darn 'qu' is just not automatic yet for some of my first grade readers, and so it remains in our three part routine, including our blending binder.

What is a Blending Binder?

Very simply, it is a three ring binder filled with index card sized consonant and vowel graphemes. The binder helps to keep the cards organized and easy to use for the last drill of the three part phonics routine. 

How do I Set it Up?

I think the easiest way to set up our binder is to start with two sets of phoneme/grapheme cards. The first pack is a set of flash cards to use with steps 1 (visual) and 2 (auditory/tactile) of the phonics routine. This set can be shuffled as needed, and cards can easily be taken out of the deck once they are mastered. You can read more about parts 1 and 2 HERE.
The second pack of cards, is to arrange in the three ring binder for blending practice. Having a second set exclusively for the binder will keep the cards organized based on initial, medial and final sounds, and ensure we are set to blend without needing to reorganize cards. 

What cards go in the initial, medial and final sound spots?

I get this questions a lot from teachers who have already started setting up their binder. The cards that are the "hardest" to place are the A-Z consonant cards. Most of the other cards have a distinct place in the binder.

Initial Sounds

Any letter that will create a vowel sound (like y, r, w) MUST go in the initial position. We also want to be conscious that some consonants can change the sound of our vowels (m and n). It does not mean these consonants have to go in the initial position, but only move them to a final position (or include a second copy) when your students are ready. Also having initial sounds that can be elongated into the vowel can help when it comes to blending "S-A-T >> SSSAAA-T >> SAT"
So here is MY list. This does not have to be your list, it is good to experiment.
c, l, h, j, k, ch, r, f, s, th, w, y, v, z, qu, followed by the initial consonant blends. We know the blends are initial sounds because the consonants are followed by a dash. I also know these consonants are out of order (I follow the sequence from Recipe for Reading)

Medial Sounds

This is where all of the vowel sounds go. I have chosen to print my vowels on yellow, but some people choose pink or blue. Really, you can pick any color you like, but having your vowel sounds on a special color help our students start to identify those sounds as a unit, and begin noticing patterns within words.
Some vowel sounds do not go IN the binder. They are meant solely for parts 1 and 2 of the drill. An example of this are the silent e cards. a-e should not go in the binder because it will not help our students to read silent e words (however it does have a great place in parts 1 and 2, because our students should choral response with "a silent e, says a").

Final Sounds

Much like the initial sounds, there is not a hard rule about what consonants go in the final location. I try to save some of the consonants that are used frequently in word families.
Here is MY final sounds list.
d, g, m, t, p, b, n, sh, x, th, followed by the double consonants, and final blends. We know the blends are final sounds because the consonants are preceded by a dash

How do I Use My New Blending Binder?

In the binder, real and nonsense words can be created. Eventually, I start to have my students look at these nonsense words as potential syllables in bigger words - with this, they are able to read open, closed, silent e, vowel team, diphthong, r-controlled and c+le words/syllables.

Then we follow the "I do, We do, You do" gradual release model of practice. I model how I tap each grapheme, while verbally producing the sound. Then, using the same word, we do it together, and finally the students on their own. Then I change ONE grapheme. At this time, I check to make sure the word follows correct phonics rules - for example I would not want to have the word KAT, because initial /k/ when with vowel a should be a C).

Do I Need More Than One Binder?

Having more than one binder is definitely helpful. I have a binder for each of my primary groups. This is so I can add appropriate graphemes as my students are introduced to them. Because my groups are all at different levels, each binder has different cards. 

Full disclosure: Because I will never lie to you! 
The phoneme/grapheme cards I have available in my TpT shop, do not create a low prep binder. Even with the various print options (direct to index cards or cut apart), it takes some time to prep. When I first started using a blending binder, I only had one. Then each year, I created another one, and each year, executing my phonics instruction has gotten easier. Every minute of prep work has been worth it (which is why I have created five for myself, and even more for colleagues) because the impact it has had on our students is monumental. 

What Are Other Teachers Saying?

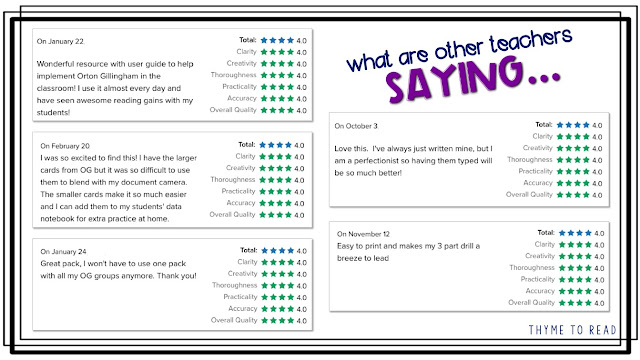
You do not need to take my word for it, other teachers are raving about the blending binders they have created to support their phonics block instruction. Overall, teachers feel that creating this binder has had a positive impact on instruction, improved student learning, and ultimately has saved time. what other teachers are saying about their Orton Gillingham Blending Binder to use during your phonics block

SAVE FOR LATER:
why you should keep your phoneme grapheme cards in a binder

Since using this tool with my students, they have become more successful and automatic with identifying vowel patterns in words. I hope sharing this tool will boost your students skills as well, and help to save you some time when planning your phonics instruction. 

You can also check out these related phonics post:


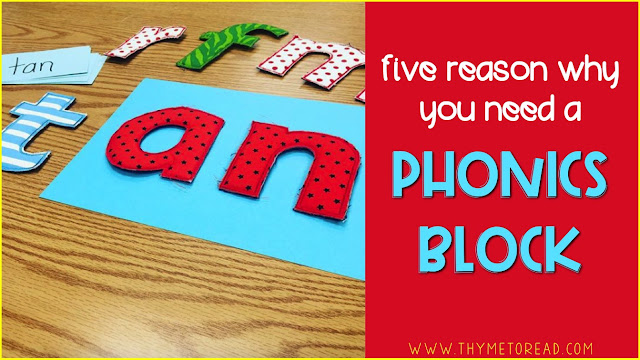
Five Reasons Why You Need A Phonics Block

Begin implementing a phonics block during ELA to improve reading and writing proficiency with elementary students

My school has recently started a "reboot" of phonics professional development, and increased instruction. We have discussed what we are currently doing, and why it is not quite enough. We have decided to be responsive to our students' needs by implementing a consistent phonics block - a time for explicit, high quality instruction that will support all of our learners, and help them to become more proficient readers and writers. We saw a gap, and something tells me that my school isn't the only one, that is seeing this need. So, why is a phonics block so important?

1. High quality instruction

A phonics block IS the time to pull out research bases strategies that support all learners. It is a time to be flexible and responsive to our students needs. This means teaching and re-teaching phonics skills/spelling patterns as needed so our students have automatic retrieval in reading and writing. It is a time to provide our students with controlled texts that contain the spelling/sound patterns they have already learned.
A phonics block is NOT time consuming and difficult to plan for. We all know that we are tight on time (both with our students, and during our planning period). The good news is that our phonics block can be pretty much the same each week, with small tweaks to keep it fresh and engaging for our students.

2. Sacred time for consistent exposure

We know that incremental exposure (the mixing of new concepts and not yet mastered concepts with a few fully mastered concepts) is a great strategy to use with sight words, math facts, vocabulary, etc. and it is the perfect strategy to use with phonics as well. In less than 10 minutes a day (maybe a little longer on the day we are first introducing a new concept), we can work in spiral review of previously learned skills to keep them current, and build more automaticity. We can also provide new teaching (introduction of a new spelling pattern) in a way that allows the brain to focus on the learning rather than the method. Meaning, by being consistent week to week, our students know what to expect from our phonics routine and can focus all of their brain power on learning the new content, rather than focusing on directions.

3. Phonics = Fluency = Comprehension

When applied phonics knowledge become automatic, it leads to improved reading fluency. Our fluent readers are also more successful with their comprehension of texts, because the brain can move from learning to read, to reading to learn. This does not mean that phonics instruction trumps or takes the place of fluency and/or comprehension instruction. It just means that one skill is helping the development of the others, and together, they can propel our students along their reading journey a little faster.

4. Support the readers who struggle

As with anything, some students may only need minimum exposure/instruction to make connections between phonetic patterns, and the associated sound. However, plenty of our students need repeated exposure and explicit instruction of spelling patterns/rules to make sense of these reading and writing building blocks. For our students who take to reading and writing like it is common sense, we can use this time push them forward and discuss multi-syllable words. For the majority of our students, we need to be aware that there is no natural connection between groups of letters and their sounds. It is our job to assign sounds to groups of letters and bring forth meaning with words. We also cannot assume that our students will master phonics by JUST reading more and practicing spelling.

5. Spelling does not equal phonics

Unfortunately, packaged reading programs (typically) lack in the area of phonics. It is often marketed as an included "spelling curriculum". Well, I'm sorry to say providing students with a weekly spelling list, and a set of homework pages is not the same as teaching phonics and spelling patterns. This kind of TEACHING follows a strategic, systematic, building block approach that cannot be outlined in a series. When a series assigns a weekly (get it, and forget it) spelling list, they are missing the structured lessons that introduce students to spelling/sound relationships, thus unlocking the countless words that can be read/written with that pattern. 

Just some food for thought: 
Are we limiting our students to 20 words that fit the pattern of the week?
Are we limiting our students to single syllable words when they should be learning how to read and write multi-syllable words? (Which is good for all students, not just our high performers.)
Are we limiting our students by assessing their spelling ability on a once a week test, rather than authentically and regularly assessing how they apply skills they have learned in their reading and writing?
So, by teaching spelling, are we limiting our students, and cutting their instruction short? ... Which in turn, could have a big (negative) impact on their ability to read and write?
This is a topic that I have been sitting on for quite a while. I think it's because it is controversial to challenge what so many people are doing - and I'm a very non confrontational person. I'm NOT saying that teachers have got it all wrong by not having a phonics block, or by following a spelling curriculum from a reading series. I AM hoping to challenge the norm a little, and provide some points to think about. The key is to provide all of our students with explicit and thorough phonics instruction that will lead them to reading and writing success. 

PIN FOR LATER:
Begin implementing a phonics block during ELA to improve reading and writing proficiency with elementary students


Before you go, check out these related phonics posts: 


Together everyone accomplishes more! 

Easily Improve Phonics Instruction with Concrete Objects

Teaching phonics with concrete objects can help spelling patterns to stick. Multi-sensory phonics instruction for first and second grade.

One of my favorite memories from Kindergarten was creating a Letter Museum. My teacher asked my classmates and I to bring in objects, pictures or drawings of things that started with the letter we were learning that week. We were all so proud of our museum, because it was something we had a hand in creating, and it had personal meaning to each one of us. 
Do you know why a primary alphabet has pictures above each letter? The reason is simple, it is building a relationship between letter name (and how it looks) and sound. If a student were to get stuck when retrieving a letter sound, the picture cue could help stimulate a connection. 
easily improve phonics instruction with concrete objects
Dough Mats from Lakeshore Learning.
My Kinders love these!

What happens though, when our students move beyond the 26 letters of the alphabet? What can we do to help build those connections? Using concrete objects to introduce new spelling patterns can create a deeper association and lasting memory of these new skills. We can use my Kindergarten teacher's idea for the "Letter Museum", and keep it relevant for our first and second graders.

You could certainly, still ask your students to bring in objects that match the phonics pattern/spelling skill you're teaching, however, that could get difficult because of the many ways to spell the same sound (LONG A: a, a_e, ai, ay, eigh). 

Instead, we can control the experience a little more by providing our students with unique opportunities to make memories with the new skill. 
teaching spelling patterns that stick using concrete objects
When teaching my students about the final -ck sound, I like to use the visual of a BACKPACK. All of my students know what a backpack is, AND, perfectly, a backpack goes on their back - just like the final -ck sound goes on the "back" of a word/syllable.

They create their backpack from a file folder and "stuff" it full of pictures and words that follow the final -ck pattern. This activity, while it takes some time, not only helps my students with a visual, but it also solidifies when they should use the final -ck pattern.

When I only have my students in front of me for 20-30 mins each day, I have to make the most out of the time I have with them. A multi-sensory project like this may look like just another craftivity, but I make sure to include word sorts, picture matching and encoding practice. This activity when paired with decodable readers, could last most of the week in my small groups. 
Even though it can be fun, it doesn't always have to be a project, or a grand production. When teaching R-Controlled vowels: 
  • We pull out the pirate patches for AR
  • We snack on popcorn for OR
  • We draw a simple picture of angry dogs for ER, IR, UR
When possible, I also try to find a read aloud to help introduce new skills to my students. THIS post shares a great book to read for R-Controlled Vowels.
These ideas while simple, can have just as great an impact on our students. The only goal we have is to help solidify a memory, and make retrieval of these sounds/spelling patterns automatic. All of this can be done with the experiences we create during our phonics block.

PIN FOR LATER: 

Let's start a list! Share in the comments some ideas you have for concrete objects. Make sure you list the phonics skill/spelling pattern it applies to.

And before you go, check out these related posts: 


My #1 Classroom Organization Solution

Classroom organization must-haves for back to school! Book boxes for small group instruction can relieve teacher stress when planning out your classroom.
I know how much you love classroom organization! It's a real feel good part of setting up our classrooms, once you figure it out. But before that, it can be a big source of stress. It took me several years to figure out an organization system that worked well for my small group instruction. And now...I want to share that with you! 

Book Boxes!

I have used these Storex book boxes, from Wal-Mart (5 for $9.97) for the past two years, and instantly fell in love. I'm a big fan of color coding, and my school uses the Fountas and Pinnell Leveled Literacy Intervention (LLI) system, which is also rainbow color coded. These bins made for no-brainer organizational alignment. 

The bins hold materials for the small groups I see throughout the week. Each grade level gets their own bin. In each bin is a folder for each student, which contains student references (such as Fundations cards and comprehension posters), our group book, progress monitoring materials, and anything else we might need for the week. You could easily modify my color coded "grade level" bins to hold materials for the small groups you meet with, just within your classroom. 

Storex is a storage solution company based out of Montreal, QC, and they were generous enough to send me a set of their newest storage option to try out before the school year ended. 

As I said, I have been using the "Large Book Bins" for a few years, and couldn't be happier with my day to day classroom organization. However, three times a year when benchmark screening comes around, I cringe at the sight of the intervention room. It has always looked like a tornado rolled through at top speed, until this last assessment period! I was gifted the BRAND NEW "Double XL Wide Book Bins". My team and I used these super large bins to hold everything we needed for end of the year assessments (both reading and math in most cases). They housed our student packets, teacher administration packets, grade level checklists and student folders (for every student on our caseload - that needed to be "stuffed" before end of the year filing). The color coding made organizing a breeze, because my Type A teacher crazy has rubbed off a little bit on my teammates too. 
I would regret not mentioning that Storex has expanded the Wal-Mart selection for this Back to School season! In addition to the large book bins, they also have a rainbow set of 5 pencil trays, individual caddies, and cubby boxes with LIDS! The caddies and cubby boxes are available in a gorgeous turquoise color, so run fast to get them! I have not used these storage options in my classroom, but after seeing them in store, I am trying to figure out how I could - especially the cubby boxes, they are a great size and super sturdy! 

Pros and Cons

Pros

  • SO STURDY! These books bins are a beast even for rough and tumble classes. 
  • Variety of sizes, and options for organization in general
  • Book bins have connecting edges for neat storage
  • Color options (if you love the colors of the rainbow + black and turquoise)
  • Coordinating colors across different "lines" of organization (my Large Book bins, perfectly match my XL Wide Book bins)
  • Wal-Mart line is affordable, even if purchasing on your own, and they have had a BTS presence for at least three years (hopefully they aren't going anywhere, anytime soon).  

Cons

  • Color options (missing orange, white and pink - which I think are popular classroom colors)
  • Label pockets included only with the Large Book Bins
  • Organization options outside of the Wal-Mart line is pricey if you are purchasing out of pocket, but would be a great option to ask your school to look into. 

What are other teachers saying?

Jenn from Reading in Room 11 says, "Year after year I would change the way I organized my reading materials because I never found a system that I loved. All of that changed when I purchased my first set of Storex bins! I loved them so much that now I use them to organize my books too! They are the perfect size, durable and lightweight! I will never use another bin!"


Kristina, a first year teacher from Utah says, "This upcoming year I will have an entirely flexible classroom. I will be using the bins for my students to store the things that they need every day. The bins will be easy for them to move around the room when they need to find the best spot for their best learning experience!"

Anna, a 3rd grade teacher, says "I love the Storex brand book boxes above all others! For years I tried different boxes in my classroom, but they never had the colors I wanted, and they never stood the test of time. These Storex boxes have lasted me many years and are well worth the investment. Pretty AND useful!!" Anna has also created beautiful labels for her Storex book bins. Check them out HERE

For several years, I tried different organization options for my small groups. I've used mailboxes, a rainbow cart with drawers, even magazine boxes - which got me close to happy, but they were just not sturdy enough. I spent more money than I care to admit trying to find something that worked.  Since stumbling upon Storex, and all they have to offer for classroom organization, I have not turned back! Everything just works, and with some of their sets being available at Wal-Mart, for a very affordable price, I have been able to grow my organization collection on a teacher's summer budget.

SAVE FOR LATER:

I would love to hear if you have tried the Storex book boxes (or other sets) in your classroom, and how they have been working out for you!

Check out these related posts: 


All You Need in a Teacher Survival Kit

dIdeas for what to keep in your personal teacher kit. Great tips for first year teachers.
Are you a first year teacher, or maybe looking for ways to be a little more comfortable in your classroom? Either way, our classrooms are where we will spend the majority of our weeks, months and years...so it is important that WE (too) have what we need in the classroom. 
It is time to build (or restock) your teacher survival kit. So, what do you need?
When I put my teacher comfort kit together, I considered items that would help me either day to day (must haves) or occasionally (wouldn't want to be caught without) . Then, I went room to room in my house and made a list of things that would be helpful to have at school.
Here is what I came up with...

Gum/Mints - Good to grab quick after lunch or on your way to an afternoon meeting.

Snack - I keep fruit cups because they have a longer shelf life, and are healthy.

Bowl/Mug - For the mornings I forget breakfast and quickly pack a baggie of oatmeal. I can heat up breakfast in my room before I become the hANGRY teacher all my students fear!

Fork/Spoon - I constantly forget to pack a spoon for my yogurt, or a fork for my salad. I was tired of running all the way to the cafeteria to grab one, so now I just leave one in my special drawer.

Blanket - You may be able to do without this one, but any teacher that lives in the North knows what it is like to come back from a school break on a Monday. The heat hasn't kicked in yet, and the ten layers you wore are not cutting it. A more universal alternative would be to keep an extra fleece at school. 
Medicine - Something like Advil/Tylenol for those quick on-set stress headaches. Cough Drops - This would be something you could bring in when you are sick, or something to leave in your special kit. Teacher Bandaids - I don't know about you, but my school's bandaids do not stick, so I keep a personal stash of the good ones.Feminine Products - enough said.Lotion - I have used this more than I thought I would. Not only for myself, but also with some of my littles as "Magic Boo Boo Lotion." For when they have nothing visible needing a bandaid, but have something that is distracting them, out comes the Boo Boo Lotion. Deodorant - If I have a late night event for school, and stay with out going home, I make sure I have things to give myself a quick refresh.  Floss/Mouth Wash/Travel Toothbrush - This goes along the lines of the quick refresh, or the surprise meeting after you ate onions on your salad.Mini-Makeup Kit - One more for a quick refresh. I had this in my kit the first year after my son was born, I used it more on a daily basis because I would run out of the house without doing my makeup. But, this might be another thing you can leave out of your kit and only bring in when you have a late night.Chapstick - For when I inevitably loose/run out of the one in my purse.Contact Solution - this is a must have for obvious reasons!  Bobby Pins/Hair Ties - Sometimes you just need to throw up your "Messy Hair, Don't Care!"Safety Pins/Needle/Thread - You never know when you will need to do a quick fix on something. 
Shout Wipes -  If you have you ever dribbled on yourself at lunch, or watched a marker roll off your desk and on to your pants, you know why this is a smart add. Lint Roller - I personally use a big roll of tape. But if I had a little more room in my drawer, I would add a lint roller

This is quite a lengthy list, and you probably will not have a need for everything on it. I personally do not keep EVERY single item on this list in my special kit, but I do have most of it. It really comes down to what you need, and what you have room for. I have dedicated a filing cabinet drawer to my special kit. The only thing that doesn't fit is my blanket (I keep that rolled up and stashed in the closet). I have a friend that uses a good 'ol fashion Cabodle, and another that keeps only a small clutch of things (I'm amazed at that). I also do not keep full sizes in my kit, I use travel sizes to save a little bit of room. When I run out of something (like mouthwash or Tylenol), I just replenish the travel size from my home supply.
 So, what do you include in your "Teacher Survival Kit"? How do you store your survival items? Please share them below in the comments so others can benefit from your experience! You can come back here to see what others have added, so make sure you 
SAVE THIS POST FOR LATER:

Check out these other related posts: 


Powered by Blogger.
Back to Top